How To Customize Your Dashboard with Widgets in GEM Software
Abstract
Customizing your dashboard with widgets in GEM Software helps you stay focused, save time, and work smarter. It allows you to create a personalized workspace that highlights what matters most to you, your leads, tasks, sales, calendar and more. This article guides you step by step to customize your dashboard with widgets in GEM Software in a way that’s simple, effective and tailored to your business needs.
Introduction
Your dashboard is the first thing you see when you log in. It should make your life easier, not harder.
In GEM Software, you can customize your dashboard with widgets that match how you work. It’s like designing your own control center. You choose what you want to see, how you want to see it, and where it should sit.
When your tools fit your flow, you get more done and feel more in control.
What are Widgets in GEM Software?
Widgets are mini-apps you place on your dashboard. Each widget shows real-time info from your GEM account.
Some examples of widgets include:
Recent leads or contacts
Pending tasks
Sales pipeline overview
Appointment calendar
Email stats
Funnel performance
Social media inbox
These widgets pull live data from your system. They update automatically so you always stay in the loop.
Benefits of Customizing Your Dashboard with Widgets
Why should you bother customizing your dashboard?
Here’s what you get:
✅ Clarity at a glance
You can see all your important data in one place. No more clicking through tabs.
✅ Better time management
You can instantly view upcoming tasks and appointments.
✅ Smarter decisions
You can track your funnel or sales in real time.
✅ Fewer distractions
You only add what you need. No clutter.
✅ More focus
You prioritize what matters most your way.
Customizing your dashboard with widgets in GEM Software is not just a design choice. It’s a productivity hack.
Step 1: Access Your Dashboard
Once you log into GEM Software, click on the “Dashboard” tab from the left-hand menu.
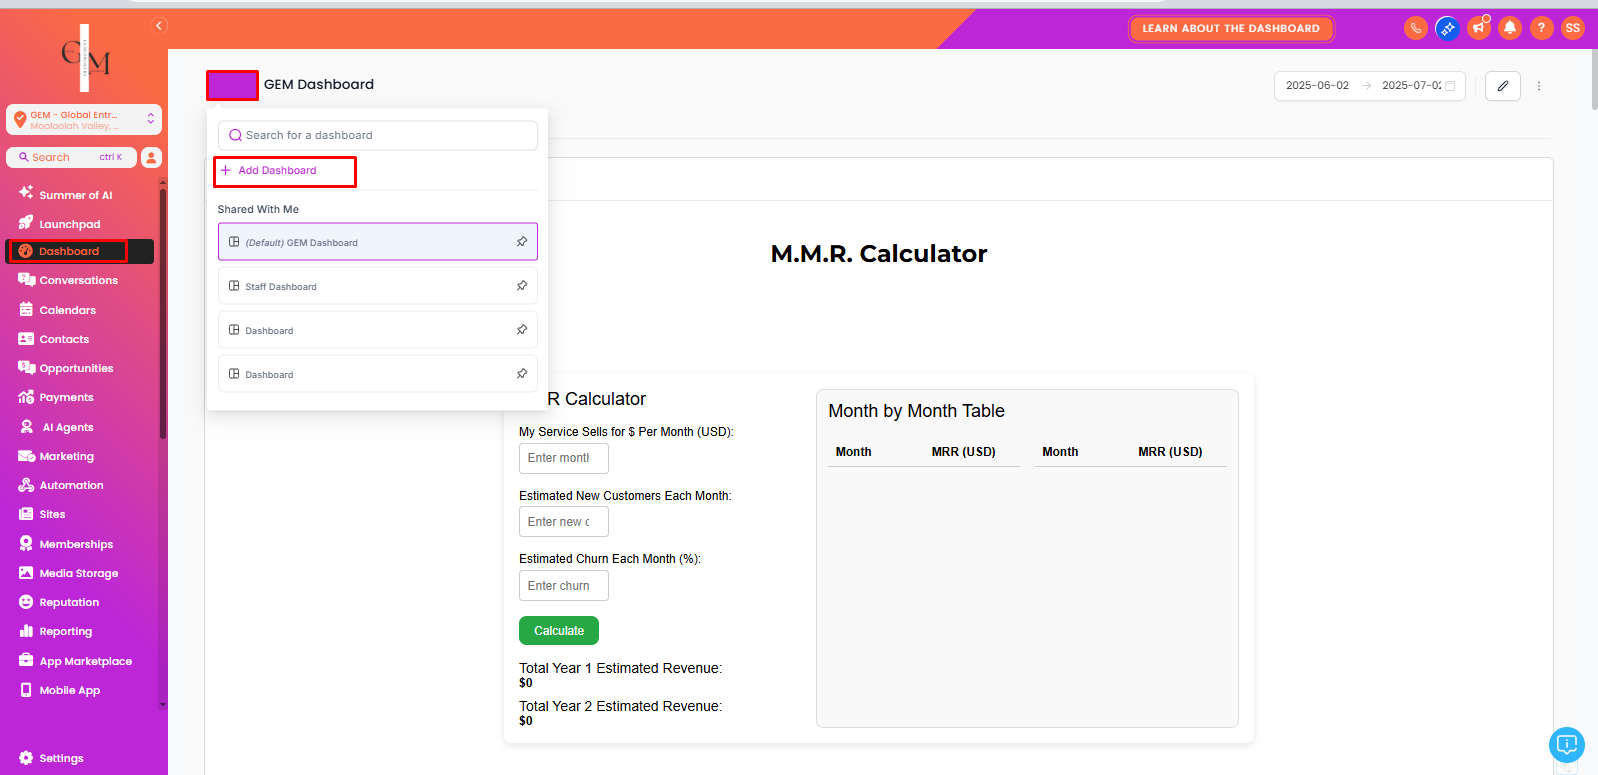
If this is your first time, you’ll see a default setup. Don’t worry. You can change everything.
Look for the “Customize” or “Add Widget” button at the top-right of the screen.
Step 2: Add Your First Widget
Click “Add Widget.” A window will pop up with available widget options.
These may include:
Tasks
Appointments
Pipelines
Contacts
Opportunities
Email performance
Call reports
Custom fields

Select the one you want. Then click “Add.”
The widget will appear on your dashboard. You can now drag it where you want it to sit.
Step 3: Arrange Your Widgets
Click and hold the top of any widget. Drag it into place.
You can stack them vertically or lay them side-by-side. GEM Software uses a grid layout, so things snap into place easily.
Pro tip: Put your top 3 priorities at the top of your screen.
Step 4: Customize Widget Settings
Most widgets in GEM Software come with basic settings.
Click the small gear or settings icon on the widget.
You can adjust:
Timeframes (e.g. daily, weekly, monthly)
Which pipeline or team member to show
Metrics you want to display
Filters to narrow down the view
Make the widget reflect your exact needs. This is where real customization happens.
Step 5: Remove or Hide Unused Widgets
If you added something you don’t need, no problem.
Click the “X” icon in the corner of the widget to remove it. You can always add it back later.
This helps keep your dashboard clean and focused.
Step 6: Create Multiple Dashboards (Optional)
Did you know you can create more than one dashboard?
In GEM Software, you can create a separate view for:
Sales team
Marketing stats
Client success
Personal productivity
Click the “+ Add Dashboard” option at the top. Give it a name. Then repeat the steps above.
You can switch between dashboards anytime from the top menu bar.
Popular Widgets to Try First
Not sure where to start? Here are some user-favorite widgets:
Opportunities by Stage: See where leads are in your funnel.
Tasks Due Today: Stay on top of priorities.
Recent Form Submissions: Track activity instantly.
Appointments Calendar: View your bookings at a glance.
Email Engagement: Monitor opens and clicks in real time.
Revenue Tracker: Keep your sales goals in front of you.
Pick 3–5 to start. You can always add more later.
Tips for a High-Performance Dashboard
Here are a few best practices to help you customize your dashboard with widgets in GEM Software like a pro:
Less is more: Avoid adding too many widgets. Focus on what you check daily.
Review weekly: Remove outdated widgets or refresh settings.
Match your goals: Use widgets that reflect your current focus leads, appointments or conversions.
Color-code (if possible): Some widgets allow styling. Use colors to differentiate areas.
Your dashboard should work like a personal assistant. If it feels cluttered, simplify.
Key Takeaways
Widgets let you see your data in real time.
You can add, move, and remove widgets easily in GEM Software.
A custom dashboard boosts focus, speed and decision-making.
You can create multiple dashboards for different views or teams.
Focus on clarity, simplicity and relevance to make it truly yours.
Conclusion
Your dashboard is where your day begins. It should help you start strong.
By customizing your dashboard with widgets in GEM Software, you take control of your workflow. You see what matters. You act faster. You reduce overwhelm.
And best of all, it’s completely yours.
So don’t settle for the default view. Build your own command center and watch your productivity soar.
Related Links
https://www.gemsoftware.com.au/gem-blog/b/how-to-customize-your-course-experience-with-the-new-theme
https://www.gemsoftware.com.au/gem-blog/b/how-to-manage-instagram-stories-using-gem-software
https://www.gemsoftware.com.au/gem-blog/b/how-to-customize-your-course-experience-with-the-new-theme
